• Skip to main content

Capitol Design | Award Winning Kitchen & Bathroom Design In Austin, TX

  • HOME
  • ABOUT
    • SERVICES
      • KITCHEN REMODELING
      • BATHROOM REMODELING
    • TESTIMONIALS
    • WHY USE US?
      • DESIGN AWARDS
      • MEDIA ARTICLES
      • VIRTUAL
      • PHILOSOPHY
      • TO THE TRADE
    • GETTING STARTED
    • WHERE WE GO
    • PRICING
  • PORTFOLIO
    • KITCHEN
      • TRADITIONAL KITCHENS
      • CONTEMPORARY KITCHENS
      • TRANSITIONAL KITCHENS
      • RANGE HOODS
      • KITCHEN ISLANDS
      • KITCHEN BACKSPLASHES
    • BATHROOMS
      • TRADITIONAL BATHS
      • CONTEMPORARY BATHS
    • OTHER ROOMS & MORE
      • ENTERTAINMENT & WET BARS
      • DINING & STUDY
      • INTRICATE DETAILS
      • WHOLE ADDITIONS
    • BEFORE & AFTER
    • SAMPLE PROJECTS
    • VIRTUAL GALLERY
    • CAN YOU DESIGN?
  • RESOURCES
    • OUR DESIGN BLOG
    • NEWSLETTER
    • RESOURCE LIBRARY
    • FAMOUS KITCHENS
    • VINTAGE KITCHENS
    • ALL AROUND AUSTIN
    • QUOTES
    • LIGHTEN UP
  • OUTDOOR
  • CONTACT
  • 512.464.1155

Blog

7 Benefits of Full Service Design Firms for Homeowners

October 20, 2026 by Capitol Design

Table of Contents

  • What a Full-Service Design Firm Actually Takes On
    • Where the Scope Starts and Stops
  • The Benefits of Full Service Design Firms, Explained
    • One Point of Accountability
    • Fewer Costly Mistakes and Better Materials
  • Inside the Full-Service Remodeling Process
  • Design Firm vs. Independent Contractor: What Changes
    • A Practical Selection Checklist
    • Risks and Limitations of Full Service
    • When Not to Hire a Full-Service Firm
  • What Full-Service Design Really Costs
    • The Four Common Fee Models
    • What the Fee Usually Covers, and What It Doesn’t
    • Evaluating Return on Investment
  • Questions to Ask a Remodeling Contractor Before You Sign
  • When a Full-Service Firm Is the Wrong Fit
  • Conclusion
  • Frequently Asked Questions

Last Updated: October 21, 2026

What a Full-Service Design Firm Actually Takes On

A full-service design firm manages a renovation from first sketch to final walkthrough. That means design, drawings, material selection, permitting, contractor oversight, and quality control all sit with one team. At Capitol Design, we have run kitchen and bath projects this way for over 35 years.

The benefits of full service design firms start with this simple fact: someone owns the whole outcome. You are not the messenger between a designer, a builder, and a tile supplier who never speak to each other.

Where the Scope Starts and Stops

Scope varies by firm, so ask before you sign. A true full-service engagement typically includes:

  • Design development and space planning
  • Construction drawings and architectural plans
  • Permit submission and coordination
  • Material, fixture, and finish selection
  • Builder or general contractor management
  • Vendor coordination and delivery scheduling
  • Site quality control through completion

What it usually excludes: structural engineering fees, major appliance costs, and furniture. Get those listed in writing.

The Benefits of Full Service Design Firms, Explained

The core benefit is fewer handoffs. Every handoff in a remodel is a place where information gets lost, and lost information costs money. Full service design consolidates those handoffs under one roof.

One Point of Accountability

When something goes wrong, you call one number. That sounds small until week six, when a cabinet arrives the wrong depth and three parties start pointing fingers. With a single firm, there is no finger-pointing, only a fix.

Fewer Costly Mistakes and Better Materials

Designers catch errors before they become demolition. Incorrectly scaled furniture, finishes that will not hold up in a wet zone, and layouts that fail inspection are all cheaper to fix on paper.

Pro Tip
Ask any firm for a sample set of construction drawings before you commit. If the drawings are thin, the coordination will be thin too.

Inside the Full-Service Remodeling Process

Most full-service remodeling processes follow six stages. Timelines stretch or compress with permit speed and material lead times, but the sequence holds.

A designer and project manager reviewing kitchen blueprints and finish samples with homeowners at a large table in a bright showroom
  1. Consultation. Goals, budget range, and scope are set.
  2. Design development. Layouts, elevations, and material direction.
  3. Drawings and permits. Construction documents go to the local building department.
  4. Preconstruction. Bids, schedules, and long-lead orders are locked.
  5. Construction. The firm coordinates trades and runs site quality control.
  6. Closeout. Punch list, final inspection, and handover.

The stage most homeowners underestimate is preconstruction.

Design Firm vs. Independent Contractor: What Changes

The design firm vs. independent contractor question comes down to coordination and risk allocation. An independent contractor builds what is drawn. A full-service design firm draws it, prices it, permits it, and then manages the build. One model suits a straightforward swap-out; the other suits a gut renovation where dozens of decisions interlock.

Factor Full-Service Design Firm Independent Contractor
Design work In-house You hire separately
Permits Firm handles Often yours to manage
Material selection Guided, trade access Usually your responsibility
Accountability Single point Split across parties
Change-order pricing Defined in contract Often negotiated mid-project
Schedule risk Firm absorbs coordination You absorb coordination
Best for Complex, high-end remodels Simple, defined jobs

A Practical Selection Checklist

Use these criteria to evaluate any firm, whether full-service or piecemeal:

  • Portfolio fit. Has the firm completed projects of similar scope, budget, and style? Ask for two case studies with before-and-after outcomes.
  • Team composition. Who is the designer, who is the project manager, and who supervises the site? Will those people change mid-project?
  • Process documentation. Can the firm show a sample set of construction drawings and a sample schedule? Thin drawings mean thin coordination.
  • Communication cadence. How often are progress updates sent, and through what channel? Who is the single point of contact?
  • Contract terms. What triggers a change order, how is it priced, and what is the payment schedule tied to?
  • References. Can you speak with a past client whose project resembled yours?
  • Insurance and licensing. Is the firm licensed and insured for the work it manages?

Risks and Limitations of Full Service

Full service is not risk-free. You give up some control over trade selection and scheduling. You may pay a coordination premium that a simple job does not justify. And you become dependent on one firm’s capacity; if the firm is stretched, your project can slow down. Ask about current workload and how the firm handles delays. Mitigating these scheduling vulnerabilities often requires a broader approach to project management that relies on integrated building services to synchronize every phase of construction.

When Not to Hire a Full-Service Firm

Full service is the wrong fit when the job is genuinely simple. Replacing a vanity and repainting a bathroom does not need drawings, permits, or a project manager, and paying for that overhead is waste. It is also a poor fit if you want to act as your own general contractor, source your own trades, and manage the schedule yourself. Full service removes control in exchange for removing burden. Some homeowners want the control more.

Contact Us For A No-Cost, No-Obligation Consultation →

Key Takeaway
Hire full service when the project has many moving parts and you want one accountable team. Hire piecemeal when the scope is narrow and you enjoy managing it.

What Full-Service Design Really Costs

Full-service design fees depend on scope, square footage, finish level, and whether construction is included. Because firms price in several ways, the same project can produce wildly different totals depending on the model. Ask each firm to state its model, its inclusions, and its exclusions in writing before you compare proposals.

The Four Common Fee Models

  • Hourly. You pay for time at a stated rate. This model is transparent per hour but open-ended in total. It suits small scopes or consulting-only engagements. Ask for a written estimate of hours by phase and a cap.
  • Flat fee per room or per project. The firm quotes a fixed design fee for a defined scope. This model is predictable and easy to compare, but change orders and scope creep are billed separately. Confirm what triggers a change order and how it is priced.
  • Percentage of construction cost. The design fee is a percentage of the build budget. This model aligns the firm’s incentive with project value, but it also means the fee rises as the budget rises. Ask whether the percentage applies to the pre-construction estimate or the final contract sum.
  • Design-build package. Design and construction are bundled under one contract. This model reduces handoffs, but it makes line-item comparison harder. Ask for a breakdown of design fees versus construction costs so you can evaluate value.

What the Fee Usually Covers, and What It Doesn’t

A full-service design fee typically covers design development, construction drawings, permit coordination, material selection, and project management through completion. It usually excludes structural engineering, major appliances, furniture, and sometimes permit fees and contractor markups. Those exclusions are where budgets blow up, so get them itemized.

Watch Out
The most common budgeting mistake is comparing a design-only quote against a design-build quote. They cover different work. Line up the inclusions first, then compare numbers.

Evaluating Return on Investment

Design fees are an investment, not just a cost. The return shows up in fewer change orders, fewer rework cycles, and better material durability. A common pattern is that projects with complete construction drawings and coordinated material selections see fewer mid-build change orders than projects that start construction with incomplete documents.

For current project pricing, see our pricing page or book a no-cost consultation.

Questions to Ask a Remodeling Contractor Before You Sign

Ask these questions to ask a remodeling contractor before signing anything. The answers reveal how the firm actually operates, not how it markets itself.

  • Who is my single point of contact, and will that person change mid-project?
  • Are construction drawings and permit management included?
  • How are change orders priced, and what triggers one?
  • Can I speak with a past client whose project resembled mine?
  • What is the payment schedule tied to?
  • Who supervises the site day to day?
  • What happens if a material is discontinued or delayed?

A firm that hesitates on the change-order question is telling you something. Listen.

When a Full-Service Firm Is the Wrong Fit

Full service is the wrong fit when the job is genuinely simple. Replacing a vanity and repainting a bathroom does not need drawings, permits, or a project manager, and paying for that overhead is waste. It is also a poor fit if you want to act as your own general contractor, source your own trades, and manage the schedule yourself. Full service removes control in exchange for removing burden. Some homeowners want the control more.

Conclusion

The hardest part of a major renovation is not picking a tile. It is keeping a dozen trades, a permit office, and a delivery schedule moving in the same direction. That coordination is exactly what a full-service firm exists to absorb. Capitol Design brings over 35 years of custom kitchen and bath experience, award-winning design work, and end-to-end project management from consultation through final walkthrough. Start with a no-cost, no-obligation consultation and see what your project actually requires.

Frequently Asked Questions

What does a full-service design firm do?

A full-service design firm handles the whole project rather than one slice of it. That means design strategy, drawings and architectural plans, permit paperwork, material and finish selection, vendor coordination, and construction oversight through to the final walkthrough. You get one team accountable for how the kitchen or bathroom looks and how it gets built, instead of hiring a designer and then separately chasing a builder, a tile setter, and a cabinet supplier.

How is a full-service design firm different from a design-build firm?

Both coordinate design and construction, but the structure differs. A design-build firm typically employs or directly contracts the construction crew under one contract. A full-service design firm leads the design and manages the build, often bringing in vetted specialists and acting as your advocate during construction. Ask any firm which entity holds the contract, who supervises the trades on site, and who you call when something goes wrong.

Can a full-service design firm manage a kitchen remodel from start to finish?

Yes, and that is the core of the model. The full-service remodeling process usually runs from an initial consultation and site measurement through design development, permit submission, ordering, demolition, installation, and punch list. For homeowners who travel or work long hours, this matters most: you approve decisions at set milestones rather than standing on site daily. Confirm the firm’s handoff points and how change orders are priced before work begins.

What should I ask before hiring a full-service design firm?

Ask who supervises the crew on site, how change orders are priced, what the payment schedule looks like, and which permits the firm pulls in your name. Request references from projects similar in size and scope to yours, and ask past clients whether the timeline and budget held. Also ask what happens if you want to change a finish mid-project. Get the answers in writing as part of the contract, not just in conversation.
Contact Us For A No-Cost, No-Obligation Consultation

Filed Under: Blog Tagged With: benefits of full service design firms, design firm vs. independent contractor, full service design, full-service remodeling process, questions to ask a remodeling contractor

Luxury Bathroom Remodeling ROI Analysis: What to Expect

October 18, 2026 by Capitol Design

Table of Contents

  • Why a Luxury Bathroom Remodeling ROI Analysis Matters
  • Luxury Bathroom Remodel Cost: Where the Money Goes
  • Bathroom Remodel Return on Investment: What the Numbers Show
  • Upgrades That Add the Most Bathroom Renovation Resale Value
  • How to Calculate ROI for Your Specific Project
  • Bathroom Remodel Before Selling: Timing and Buyer Appeal
  • Deciding When a Luxury Bathroom Remodel Is Worth It
  • Conclusion
  • Frequently Asked Questions

Last Updated: October 19, 2026

Why a Luxury Bathroom Remodeling ROI Analysis Matters

A luxury bathroom remodeling ROI analysis estimates how much of your renovation spend you recover when you sell. It pairs project cost against added resale value, then adjusts for your timeline and neighborhood. That single exercise separates a smart investment from an expensive hobby.

At Capitol Design, we have spent over 35 years designing and building custom kitchens and baths for clients who care about both beauty and resale. Our view is blunt: a luxury bath is a financial decision as much as a design one. Strategic choices regarding the layout, particularly the debate over shower versus bathtub resale, often determine whether your investment yields a premium return or merely maintains the status quo.

Most homeowners skip the math. They pick finishes they love, then hope the market agrees. It usually does, but not always at the level they expect.

Below, we break down where the money goes, which upgrades pay back, and how to run the numbers yourself.

Key Takeaway
Cost recovery on a bathroom remodel is rarely total. Plan for a partial return on resale and count daily enjoyment as part of the yield.

Luxury Bathroom Remodel Cost: Where the Money Goes

Labor eats the largest share of any high-end bath. Skilled tile setters, plumbers, and electricians command premium rates, and complex layouts add hours fast. Materials come second: stone, custom cabinetry, and designer fixtures carry real markups.

Here is how a luxury budget typically splits:

  • Labor and trades: rough-in plumbing, electrical, waterproofing, tile setting
  • Stone and tile: marble, quartz, slab work, mosaics
  • Cabinetry and vanities: custom millwork, hardware, countertops
  • Fixtures: freestanding tub, rain shower, thermostatic valves
  • Lighting and ventilation: recessed fixtures, sconces, exhaust fans
  • Design and project management: drawings, permits, site oversight

Pricing depends on size, finish level, and structural changes, so we quote each project individually. You can review current ranges on our pricing page.

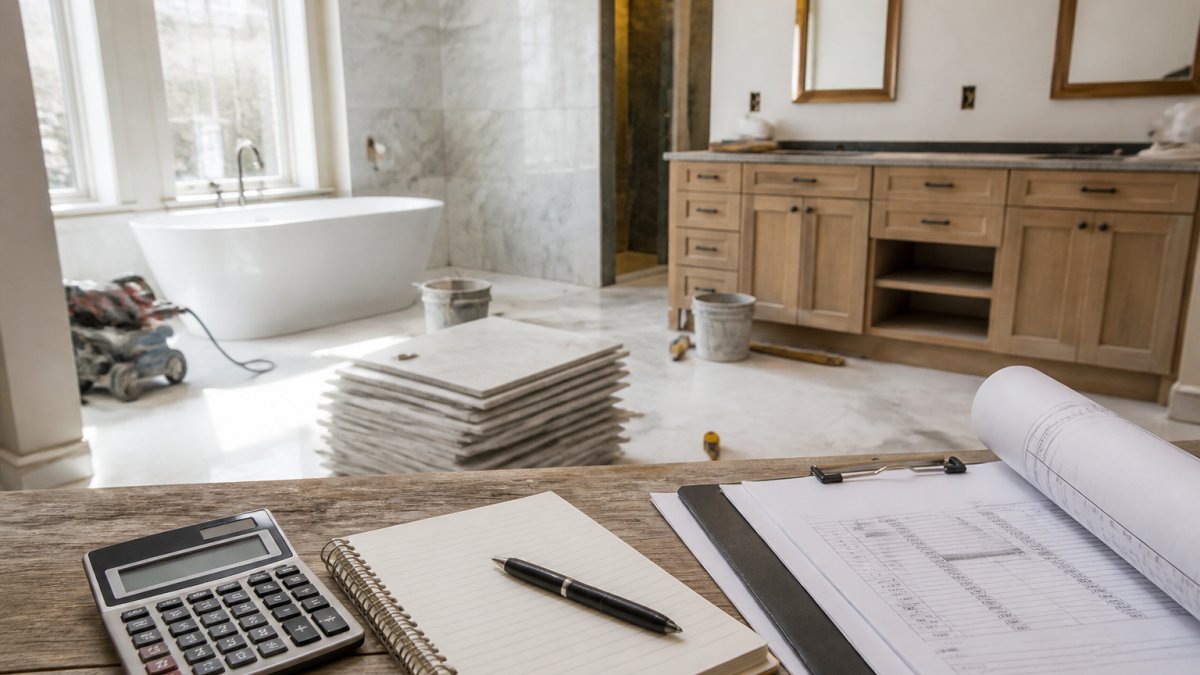
A luxurious bathroom under renovation with marble tiles, a freestanding tub, and a double vanity, showing construction materials and tools in a bright, upscale setting

Bathroom Remodel Return on Investment: What the Numbers Show

Bathroom remodel return on investment is the share of your spend that shows up as home value at resale. The number most homeowners quote comes from annual cost-versus-value studies that pair a national average project cost with the resale value an agent estimates it adds. Those studies are useful as a starting point, but they are averages, and averages hide the two things that matter most in a luxury project: scope and assumptions.

How the percentage is actually built. Cost recovery is added resale value divided by total project cost, expressed as a percentage. Three inputs drive the result:

  • Project cost, design fees, permits, labor, materials, and contingency, not just the contractor’s bid.
  • Added value, what a buyer would pay for the finished bath versus the existing one, estimated from comparable sales, not from what you spent.
  • Scope tier, minor refresh, midrange remodel, or upscale remodel. Each tier recovers a different share.

The consistent pattern across published studies and appraiser experience is that recovery percentage falls as scope rises. A midrange bath typically recouches a larger share of its cost than an upscale one, even though the upscale bath adds more dollars in absolute terms. That is not a flaw in luxury work; it is the arithmetic of diminishing returns at the top of the finish spectrum.

Why luxury recovery is lower, and why that is not the whole story. An upscale bath carries costs buyers do not fully price in: custom millwork, slab stone, steam systems, and complex waterproofing. A buyer sees a beautiful room and pays a premium for it, but rarely the full premium you paid. The gap between spend and recovered value is the price of daily enjoyment, and it should be budgeted as such rather than treated as a loss.

Disclose your assumptions. Any ROI figure is only as good as the assumptions behind it. Before you trust a percentage, yours or a study’s, write down:

  • The home’s current value and where it sits relative to the neighborhood price ceiling.
  • The scope tier and whether structural, plumbing, or electrical changes are included.
  • Local labor and material costs, which vary widely by market.
  • The holding period: resale recovery assumes a sale, while a long stay converts part of the return into years of use.
Watch Out
Over-improving is the most common luxury mistake. A bath that outclasses every other home on the street rarely returns its full cost, no matter how well it is built.

Run the percentage for your own scope and assumptions rather than borrowing a national average. The next section shows how to do that line by line.

Upgrades That Add the Most Bathroom Renovation Resale Value

Bathroom renovation resale value comes from upgrades buyers can see, use, and trust, but in a luxury project the question is not whether an upgrade is nice, it is whether it pays back relative to its cost. Most broad ROI articles stop at ‘add a double vanity.’ A luxury-specific analysis has to separate the features that carry their weight from the ones that mostly serve the owner.

Upgrades that tend to carry their cost:

  • Neutral stone or quartz countertops. Broad appeal, durable, and easy for a buyer to price. Patterned or highly veined slabs narrow the buyer pool.
  • A curbless walk-in shower with quality tile. Accessibility and clean lines read as current and functional; the waterproofing behind it is invisible but protects the investment.
  • A double vanity where the layout supports it. A daily-use feature buyers notice immediately, provided it does not crowd the room.
  • Updated lighting and strong ventilation. Cheap relative to the rest of the budget and directly tied to comfort and moisture control.
  • Efficient fixtures and clean plumbing. Buyers and inspectors both look for this; it removes objections rather than adding wow.
  • Smart storage that hides clutter. Custom cabinetry pays back when it solves a real layout problem, not when it simply adds millwork.

Upgrades that mostly serve the owner:

  • Steam showers and saunas. High cost, narrow buyer pool, and maintenance the next owner may not want.
  • Heated floors in every zone. Pleasant and increasingly common, but the payback is enjoyment, not resale, once it covers more than the primary bathing area.
  • Elaborate tile patterns. They date faster than neutral stone and can read as a specific taste rather than a neutral upgrade.
  • Oversized tubs in small rooms. They consume floor space buyers would rather see in the shower or storage.

The mechanism behind the ranking. Buyers price what they can verify: function, finish quality, and absence of problems. They discount what is personal, high-maintenance, or hard to change. That is why a well-executed neutral bath outsells a flashy one with unusual choices, and why the highest-return luxury spend tends to be the invisible work, waterproofing, plumbing, ventilation, paired with restrained, durable finishes.

Contact Us For A No-Cost, No-Obligation Consultation →

A practical test for any upgrade. Before you fund a feature, ask three questions: Would a typical buyer in this neighborhood expect it? Can it be maintained without special knowledge? Does it solve a daily frustration? Two yeses justify the spend; one or none means you are buying enjoyment, which is fine as long as you count it that way.

Pro Tip
Our advice after decades of projects: spend on the shower, the lighting, and the storage. Those three drive daily satisfaction and buyer confidence more than any other line item.

How to Calculate ROI for Your Specific Project

Start with a simple formula: added home value divided by project cost, then expressed as a percentage. The hard part is estimating added value honestly.

Use this checklist:

  • Pull recent sale prices for similar homes with updated baths nearby
  • Ask a local agent for a realistic post-renovation value range
  • Separate must-fix items from wish-list items in your scope
  • Get itemized bids so you can compare line by line
  • Add a contingency of 10 to 15 percent for surprises
  • Recalculate ROI for a minor, midrange, and luxury version

Run all three versions before you commit. The comparison often changes the scope.

Scope Relative Cost Typical Cost Recovery Best For
Minor refresh Low Highest share Selling soon
Midrange remodel Medium Strong share Most homeowners
Upscale remodel High Moderate share Long-term owners

Bathroom Remodel Before Selling: Timing and Buyer Appeal

A bathroom remodel before selling works best when it removes objections rather than adding wow. Buyers walk in looking for problems: water stains, dated tile, weak water pressure, poor light.

Fix those first. A clean, bright, neutral bath with solid fixtures reads as well-maintained. That reduces inspection requests and invites stronger offers.

Timing matters too. Complete the work well before listing so photos look finished and any punch-list items are resolved.

If you plan to stay several more years, the calculus shifts. You get years of daily use plus a partial recovery at sale. That combination often justifies a higher-end scope.

Deciding When a Luxury Bathroom Remodel Is Worth It

A luxury bath is worth it when three things line up: you will stay long enough to enjoy it, your scope fits the neighborhood, and the design solves real functional problems.

If you are selling within a year, favor a minor or midrange scope. If this is your forever home, invest in what you will use every day.

Ask yourself:

  • How long will we stay?
  • Does our home already sit at the top of the local price range?
  • Which upgrades fix daily frustrations?
  • Can we afford the scope without stretching?

Honest answers here beat any percentage.

Conclusion

Getting a luxury bath right means knowing what you will recover and what you simply get to enjoy. Capitol Design brings over 35 years of custom kitchen and bath experience, award-winning design work, and a full-service process built for busy clients. We handle design, permits, and construction end to end, with a no-cost, no-obligation consultation to start. Contact us to plan a bathroom that earns its keep.

Frequently Asked Questions

What is the average ROI for a luxury bathroom remodel?

There is no single average, but upscale bathroom remodels typically return 50-60% of project cost at resale, while midrange remodels often recover 60-70%. Luxury projects with high-end materials and custom features tend to have lower cost recovery percentages because the investment is larger, but they can attract buyers and support a higher asking price. The exact return depends on your local market, home value, and buyer preferences.

Which bathroom upgrades offer the best return on investment?

Practical, visible upgrades usually deliver the strongest returns: a new vanity, updated fixtures, quality lighting, and neutral tile. Heated floors and smart mirrors add appeal but may not recoup their full cost. Oversized luxury items like a steam shower or designer tub can be hit-or-miss depending on neighborhood expectations. Focus on improvements that improve daily function and match the style of nearby homes.

How do you calculate the ROI of a bathroom renovation?

Estimate the value the renovation adds to your home by comparing your home’s post-remodel value with similar updated homes in your area, then divide that added value by the total project cost. For example, if a $60,000 remodel adds $40,000 in value, the ROI is about 67%. Use local comparable sales, not national averages, and account for all costs including design, permits, and labor.

Is it worth remodeling a bathroom before selling a home?

It can be, but only if the current bathroom is dated or dysfunctional enough to deter buyers. A minor refresh (new fixtures, paint, and lighting) often pays off more reliably than a full luxury overhaul. If your bathroom is already functional and clean, you may be better off selling as-is and letting the buyer customize. Consult a local real estate agent to gauge buyer expectations in your price range.

Contact Us For A No-Cost, No-Obligation Consultation

Filed Under: Blog Tagged With: bathroom remodel return on investment, bathroom remodeling roi, bathroom renovation resale value, luxury bathroom remodel cost, luxury bathroom remodeling roi analysis

Custom Kitchen Design for Small Spaces: 7 Steps

October 17, 2026 by Capitol Design

Table of Contents

  • Start With a Measured Plan, Not a Mood Board
    • The Measurements That Decide Everything
  • Small Kitchen Layout Ideas That Actually Fit
    • Galley, L-Shaped, and U-Shaped Plans
    • Can a Small Kitchen Have an Island or Peninsula?
  • Small Kitchen Storage Ideas That Use Every Inch
    • Vertical Storage and Tall Cabinetry
    • Corners, Pull-Out Pantries, and Drawer Organizers
  • Custom Small Kitchen Cabinets: What to Specify
    • The Dimensions That Drive the Specification
    • Interior Fittings That Earn Their Cost in a Small Kitchen
    • Door Style, Finish, and the Visual Trade-Off
    • What Custom Actually Buys You
  • Compact Appliances and the Work Zones Around Them
  • Small Kitchen Remodel Ideas for Light, Space, and Style
  • Budget, Utilities, and Accessibility: The Constraints to Plan For
    • Budget: Where the Money Goes and Where to Trade Off
    • Utilities: The Checks to Run Before You Order
    • Accessibility: Design for the People Who Use the Room
  • Frequently Asked Questions

Last Updated: October 18, 2026

Start With a Measured Plan, Not a Mood Board

Custom kitchen design for small spaces starts with a tape measure, not a Pinterest board. A beautiful inspiration photo means nothing if the room can’t hold a 36-inch refrigerator and still leave you a place to stand.

Most guides show gorgeous photos of tiny kitchens and skip the numbers that make them work. A compact space lives or dies on measurements: get them right and a 60-square-foot kitchen cooks better than a 150-square-foot one laid out badly.

The Measurements That Decide Everything

Start by drawing your room to scale. Measure every wall, window, door, and outlet. Then mark these clearances, which follow standard kitchen planning practice:

  • Walkway: at least 36 inches between counters; 42 inches if two people cook
  • Work aisle: 42 inches between the sink and cooktop runs
  • Door swing: leave room for doors to open without hitting cabinets

U.S. Department of Housing and Urban Development design standards offers guidance on clearances and accessibility worth checking before you commit.

Pro Tip
Photograph every wall before demolition. Old outlets, gas lines, and vent paths hide behind drywall, and a photo record saves hours when the contractor asks where the shutoff valve was.

Small Kitchen Layout Ideas That Actually Fit

Small kitchen layout ideas come down to three shapes: galley, L-shaped, and U-shaped. Picking the wrong one wastes space you can’t get back.

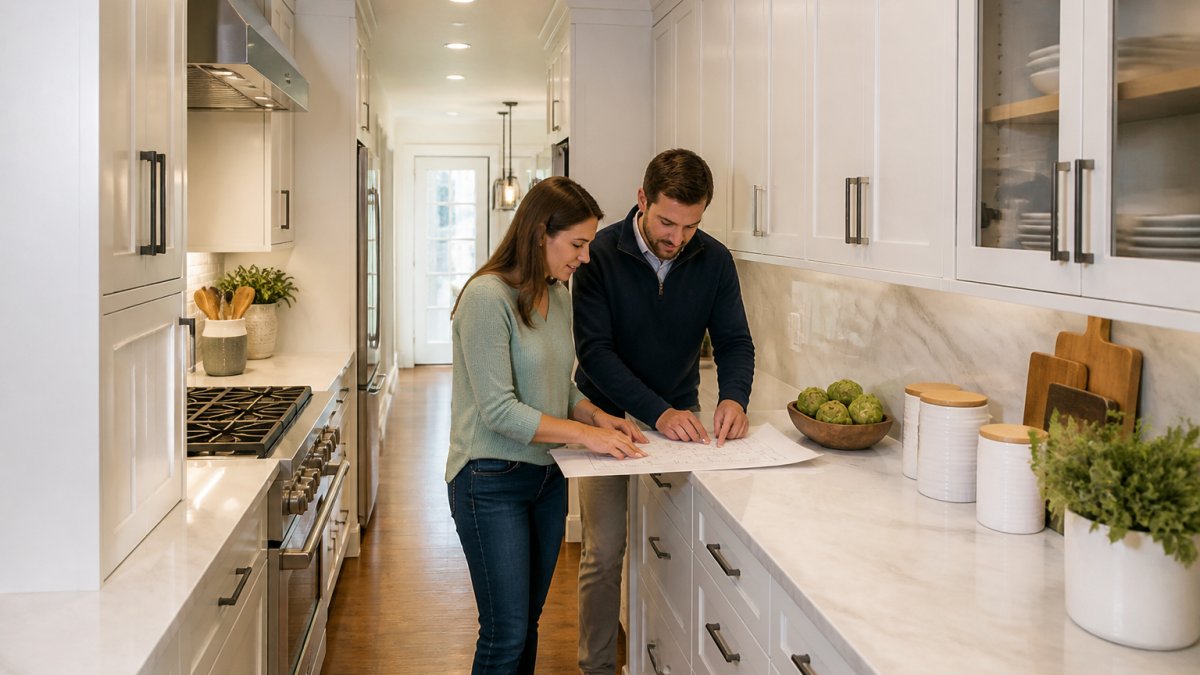
A bright galley kitchen in a compact home, with white custom cabinetry on both sides, a narrow walkway, and a designer and homeowner reviewing a floor plan on the counter

Galley, L-Shaped, and U-Shaped Plans

A galley kitchen runs counters along two facing walls.

An L-shaped kitchen puts counters on two adjoining walls and leaves the other two open. It works well when a door or window sits on one wall.

A U-shaped kitchen wraps counters on three sides. It gives the most storage and counter space, but only fits rooms wide enough to keep a 36-inch walkway.

Can a Small Kitchen Have an Island or Peninsula?

Yes, but only with the right clearance. An island needs at least 36 inches of walkway on all open sides, so a room under about 10 feet wide usually can’t hold one. A peninsula is the smarter choice: it attaches to a wall or cabinet run and adds prep space and seating without eating the floor.

Watch Out
Squeezing an island into a narrow kitchen creates a walkway under 36 inches. You’ll bump hips on the counter every time you cook, and the room will feel smaller, not bigger.

Small Kitchen Storage Ideas That Use Every Inch

Small kitchen storage ideas work best when they go vertical. Floor space is fixed; wall height is not, so use every inch from floor to ceiling.

5 Small Kitchen Design Ideas My Clients Love ❤️

Fifi McGee | Interior Design & Renovations

Vertical Storage and Tall Cabinetry

Run cabinets to the ceiling instead of stopping at 84 inches. The top shelf holds seasonal items and rarely-used pans, gaining a full cabinet’s worth of storage. Tall pantry cabinets, 84 to 96 inches high, replace closets and hold dry goods, small appliances, and cleaning supplies in one column.

Corners, Pull-Out Pantries, and Drawer Organizers

Corners are where small kitchens lose the most space. A blind corner cabinet swallows items you’ll never reach again; swap it for a corner carousel or pull-out system that brings the back of the cabinet to you.

  • Pull-out pantry: a narrow 12-inch cabinet that slides out to reveal full shelves
  • Drawer organizers: dividers for utensils, deep drawers for pots
  • Toe-kick drawers: shallow drawers under base cabinets for sheet pans

Custom Small Kitchen Cabinets: What to Specify

Custom small kitchen cabinets earn their cost through fit, not size. In a compact room, stock cabinets leave gaps and dead space at the ends of runs, above the refrigerator, and in corners. Custom cabinetry fills those gaps and lets you control depth, height, and interior layout so the cabinet works around the room.

The Dimensions That Drive the Specification

Bring these numbers to your first design meeting; they determine what will actually fit:

  • Base cabinet depth: 24 inches is standard; 21-inch or 18-inch base cabinets are available for very tight runs and buy back floor space.
  • Upper cabinet depth: 12 inches is standard; 10-inch or 9-inch uppers over a shallow counter free up headroom and sightlines.
  • Upper cabinet height: 30, 36, or 42 inches. In a small kitchen, 42-inch uppers that run to the ceiling add a full shelf of storage.

Interior Fittings That Earn Their Cost in a Small Kitchen

The interior is where a small kitchen gains or loses usable storage:

  • Full-extension, soft-close drawer glides let you see and reach the back of every drawer. In a 24-inch-deep base cabinet, that is the difference between using the whole drawer and using the front third.
  • Pull-out shelves in base cabinets turn a deep, dark cabinet into two or three accessible trays. They cost more than a fixed shelf but are the single highest-value upgrade in a compact kitchen.
  • Corner carousels or blind-corner pull-outs replace the dead zone where two cabinet runs meet. A lazy Susan uses the corner; a blind-corner pull-out brings the back of the cabinet to the door opening.

Door Style, Finish, and the Visual Trade-Off

In a tight room, the cabinet front is most of what you see. A slab (flat-panel) door reads cleaner than a raised-panel door and is easier to wipe down; Shaker doors suit both traditional and modern homes. Light, matte finishes reflect light without glare; glossy finishes bounce more light but show fingerprints. Two or three finishes across cabinets, counters, and backsplash read calmer than five.

Contact Us For A No-Cost, No-Obligation Consultation →

What Custom Actually Buys You

A design partner pays off in details a stock catalog cannot solve: a cabinet built to an out-of-square wall, a refrigerator surround that matches the run, or a drawer stack sized to the pots you actually own. Capitol Design provides custom cabinetry solutions tailored to the exact room, ensuring no inch goes to waste.

Pro Tip
Ask for a cabinet layout drawing with dimensions before you sign. Walk the drawing with a tape measure in the room and mark each cabinet’s footprint on the floor with painter’s tape. It is the cheapest way to catch a cabinet that will not open, a drawer that will hit an appliance, or a run that leaves no landing space.

Compact Appliances and the Work Zones Around Them

Compact appliances save space only when they sit in the right spot. Plan three work zones: storage (fridge and pantry), prep (sink and counter), and cooking (range). Each zone needs its own landing space.

  • Refrigerator: 24 to 30 inches wide; leave 15 inches of counter beside it
  • Range: 24 to 30 inches wide; keep 12 inches of counter on each side
  • Sink: a single-bowl sink frees counter space over a double

Keep the distance between the sink, fridge, and range short so you’re not crossing the room to drain pasta.

Small Kitchen Remodel Ideas for Light, Space, and Style

Small kitchen remodel ideas that add light do more for a compact room than any other change. Light colors, reflective surfaces, and good lighting make a tight space feel open.

  • Paint cabinets and walls in light, warm tones
  • Use a glossy or glass backsplash to bounce light
  • Add under-cabinet lighting to brighten counters

Keep the palette simple: two or three finishes read calmer than five. A peninsula with a breakfast bar adds a seating nook without the footprint of a full island.

Key Takeaway
In a compact kitchen, light and reflection do the work of extra square feet. Pale finishes and layered lighting make the room feel bigger than its floor plan.

Budget, Utilities, and Accessibility: The Constraints to Plan For

Every custom kitchen design has to answer to three constraints: money, mechanicals, and the people who use the room. In a small kitchen they decide the plan, because a compact room has less room to absorb a surprise.

Budget: Where the Money Goes and Where to Trade Off

Custom work costs more than stock, and the gap is widest in cabinetry. A practical way to plan is to separate the budget into four buckets and decide the split before you shop:

  • Cabinetry and countertops typically take the largest share of a custom kitchen budget. Custom cabinetry costs more per linear foot than stock, but it eliminates filler strips, end panels, and the dead space that stock leaves in a small room.
  • Appliances are the easiest place to trade down. A 24-inch range or an 18-inch dishwasher costs less than the full-size version and fits a compact plan better.
  • Labor and installation rise when you move plumbing, gas, or electrical. Keeping the sink, range, and refrigerator near their existing lines is the single biggest cost control in a small remodel.

Ask your designer for a line-item breakdown so you can see where to trade off. A common pattern is to spend on cabinet interiors and lighting, and save on the appliance package and backsplash.

Utilities: The Checks to Run Before You Order

Relocating a sink, range, or vent means new plumbing, electrical, and sometimes a range hood duct. The runs are short in a small kitchen, but the walls are where the constraints hide:

  • Plumbing: confirm the drain and supply locations before the cabinet layout is final. A sink that moves a few feet can require a new vent stack.
  • Gas and electrical: a range that moves from one wall to another may need a new gas line or a dedicated circuit. Check the panel capacity before you plan an induction cooktop or a wall oven.
  • Ventilation: a range hood needs a duct path to the exterior. Recirculating hoods avoid the duct but filter rather than exhaust. Check local code for venting requirements before finalizing the plan.

Accessibility: Design for the People Who Use the Room

If anyone in the home has limited mobility, or if you plan to age in place, put these in the plan from day one:

  • Counter heights: a standard 36-inch counter works for many people; a 34-inch section or an adjustable-height work surface serves seated users and shorter household members.
  • Reach ranges: keep everyday items between roughly 15 and 48 inches above the floor. That means the most-used shelves in the pantry and the upper cabinets should sit in that band.
  • Pull-out shelves and lever handles reduce reaching and twisting. Lever handles are easier to operate than knobs for people with limited grip strength.

A plan that ignores budget and mechanicals looks great on paper and falls apart on site. Walk the plan with your contractor before demolition, mark appliance locations on the floor with tape, and test the walkway. Visualizing these physical boundaries helps maintain the necessary flow while avoiding a cluttered look that often compromises the functionality of compact culinary environments.

Watch Out
Do not finalize a custom cabinet order until the plumbing, electrical, and vent locations are confirmed on site. A cabinet built to a plan that assumed the wrong drain location is an expensive mistake in any kitchen, and a small kitchen has no room to absorb it.

Frequently Asked Questions

What is the best layout for a small kitchen?

For most small kitchens, a galley or L-shaped plan works best because both keep the work triangle compact. A galley gives you counters on two facing walls and suits narrow rooms; an L-shape frees up wall space for tall cabinets and a small table. Aim for at least 36 inches of clear walkway between counters, and keep the sink, range, and refrigerator within easy reach of each other. A custom kitchen design for small spaces should be built around your actual measurements, not a generic template.

How can I maximize storage in a small kitchen?

Go vertical. Full-height custom small kitchen cabinets that run to the ceiling add storage without taking up floor space, and a pull-out pantry turns a 12-inch gap into usable shelving. Use drawer organizers instead of deep base shelves, add corner carousels or blind-corner pull-outs, and keep open shelving for daily items so upper cabinets stay uncluttered. Every inch counts, so measure the space above the fridge and below the sink before you finalize the plan.

Can a small kitchen have an island?

Sometimes, but only if the room allows it. An island needs roughly 36 inches of clearance on all sides for comfortable movement, and 42 inches if two people work at once. If your kitchen is too narrow, a peninsula attached to a wall or a slim rolling cart gives you extra prep space and seating without blocking the walkway. A designer can test both options on a measured floor plan before any cabinets are ordered.

How do you make a small kitchen look bigger?

Light colors on cabinets and walls, reflective surfaces like a glossy backsplash, and good lighting all make a compact kitchen feel more open. Removing a soffit and running cabinets to the ceiling draws the eye upward, and glass-front or open shelves reduce visual weight. Keep countertops as clear as possible and choose a consistent floor and cabinet tone so the eye isn’t broken up by contrast. These small kitchen remodel ideas cost little but change how the room reads.


A small kitchen asks more of its design than a large one. Every inch has to earn its place, and the difference between a cramped room and a hardworking one comes down to planning. Capitol Design brings over 35 years of custom kitchen and bath experience, award-winning design work, and a no-cost, no-obligation consultation to help you plan a compact kitchen that fits your home and your budget. Get started with Capitol Design and turn your small space into a kitchen that works.

Contact Us For A No-Cost, No-Obligation Consultation

Filed Under: Blog Tagged With: custom kitchen design, custom kitchen design for small spaces, custom small kitchen cabinets, small kitchen layout ideas, small kitchen remodel ideas, small kitchen storage ideas

How to Maximize Home Resale Value: 2026 Guide

October 15, 2026 by Capitol Design

Table of Contents

  • Start With a Prioritization Framework, Not a To-Do List
    • Read Your Local Market Before You Spend
    • Triage Repairs Before You Upgrade
  • Home Improvements That Increase Value: What Actually Moves the Needle
    • Curb Appeal, Exterior Maintenance, and First Impressions
    • Interior Paint, Cleaning, and Decluttering
  • Kitchen Remodel Resale Value: Where to Spend and Where to Stop
    • Build Your Own ROI Estimate Instead of Trusting a National Average
    • What Each Tier Actually Costs and What It Returns
    • Where the Money Actually Comes Back
    • The Stop Rule
  • Bathroom Remodel Resale Value: Fixtures, Hardware, and Smart Upgrades
  • Flooring, Energy Efficiency, and Low-Cost Improvements With Resale Potential
    • Flooring and Carpet Decisions
    • Energy-Efficient Upgrades and Smart Home Technology
  • Your Home Renovation Project Checklist: Timeline, Budget, and Risk Control
    • Step 1: Get a Pre-Sale Inspection Before You Spend a Dollar on Cosmetics
    • Step 2: Build a Budget With a Real Contingency
    • Step 3: Understand the Renovation Risks Nobody Warns You About
    • Step 4: Match Your Plan to Your Selling Horizon
    • Step 5: Know When to Stop
  • Frequently Asked Questions

Last Updated: October 16, 2026

Start With a Prioritization Framework, Not a To-Do List

The biggest mistake sellers make is treating every upgrade as equally urgent. Knowing how to maximize home resale value starts with one question: which projects will actually raise your home resale value?

Capitol Design has over 35 years of experience in custom kitchen and bath design, and we have watched which upgrades return money at closing.

Read Your Local Market Before You Spend

Your neighborhood sets the ceiling. If nearby homes sell with original kitchens and dated baths, a full luxury remodel can price you out of the block. Compare your home against recent listings by condition, not just size, then match your spending to that level.

Triage Repairs Before You Upgrade

Fix broken things first. A leaking faucet or cracked tile signals neglect to every buyer.

  • Repair before you replace
  • Safety issues come first
  • Cosmetic upgrades come last
Watch Out
Skipping repairs to fund a cosmetic upgrade is a classic mistake. Buyers spot deferred maintenance during inspection and often negotiate the price down by more than the repair would have cost.

Home Improvements That Increase Value: What Actually Moves the Needle

Not all home improvements that increase value work the same way. Some pay back a large share of their cost at sale; others pay back in daily enjoyment.

A homeowner and a design professional reviewing paint color swatches and a project plan on a kitchen counter in a bright, modern home

Curb Appeal, Exterior Maintenance, and First Impressions

Buyers judge your home in the first thirty seconds. Curb appeal is the cheapest lever you have.

  • Power-wash the siding, walkway, and driveway
  • Repaint or replace the front door
  • Trim overgrown landscaping

Interior Paint, Cleaning, and Decluttering

Fresh paint is the highest-return, lowest-risk upgrade in almost any home. Neutral colors help buyers picture their own furniture in the space.

Cleaning and decluttering matter just as much: cluttered rooms feel smaller than they are, shrinking the usable square footage in a buyer’s mind.

  • Patch nail holes and cracks first
  • Choose warm whites and soft grays
  • Remove personal photos and excess furniture
Pro Tip
Paint the walls before you list, not after. A buyer who sees scuffed, dated walls assumes the rest of the house was maintained the same way.

Kitchen Remodel Resale Value: Where to Spend and Where to Stop

Kitchen remodel resale value depends on restraint, not extravagance. The kitchen sells the house, but only if the update matches the home and the neighborhood. National averages are just a starting point for a conversation about your block.

Build Your Own ROI Estimate Instead of Trusting a National Average

A realistic return estimate comes from three numbers you can actually look up:

  1. Your project cost. Get at least two contractor estimates in writing. Add a 15% contingency for surprises behind the walls, older homes almost always have some.
  2. Your local comparable sales. Pull three to five recent sales of homes similar to yours in size, age, and condition. Note the sale price and kitchen condition in each.
  3. The condition gap. If every comparable sold with an updated kitchen and yours is original, a modest update may be necessary just to compete, not to gain value, but to avoid a discount. If comparables sold with original kitchens, a full remodel can push you past what buyers in that block will pay.

The comparison that matters is not your cost versus a national percentage, but your cost versus the price difference between updated and non-updated homes in your comparable set. That spread is your ceiling.

What Each Tier Actually Costs and What It Returns

Costs vary by region, home age, and finish level, but the tiers below reflect ranges most practitioners see in mid-market homes. Treat them as planning brackets, not quotes.

Approach Typical Scope Planning Cost Range Best For Resale Risk
Cosmetic refresh Paint, hardware, fixtures, backsplash, deep clean $1,500-$6,000 Most resale situations Low
Minor update Cabinet refacing, new countertops, one or two appliances $12,000-$30,000 Homes priced at or slightly above the neighborhood median Moderate
Mid-range remodel New cabinets, countertops, appliances, flooring, lighting $30,000-$75,000 Homes that will remain competitive in their price band Moderate to high
Full gut renovation Layout changes, new plumbing and electrical, permits $75,000+ Long ownership horizons or luxury markets High

These are planning brackets, not promises. A kitchen in a 1,200-square-foot ranch and one in a 3,500-square-foot colonial do not carry the same cost or return, even in the same city.

Where the Money Actually Comes Back

Buyers respond to what they can see and touch on a showing. In rough order of return-per-dollar:

  • Cabinet refacing or painting instead of full replacement, often a fraction of the cost and most of the visual change
  • New hardware and faucet, inexpensive, high-visibility, easy to install
  • Updated lighting, under-cabinet strips and modern pendants change how the whole room reads

What tends to underperform: high-end appliance packages in a mid-market home, custom cabinetry in a neighborhood of stock kitchens, and any layout change that requires moving plumbing or load-bearing walls.

The Stop Rule

Before you sign a contract, answer one question: after this project, will my home be the most expensive on the block? If yes, stop. Buyers cannot justify a price their lender’s appraisal will not support, no matter how good the finishes are. A kitchen that matches the top of your comparable set sells; one that exceeds it is a kitchen you paid for and someone else enjoys.

Pro Tip
Before you commit to a kitchen project, walk three recent comparable sales in person if you can. Photos hide condition. Standing in the room tells you what your buyer will actually compare your kitchen against.

Bathroom Remodel Resale Value: Fixtures, Hardware, and Smart Upgrades

Bathroom remodel resale value comes from small, visible changes. Buyers scan for cleanliness, water pressure, and storage, and rarely measure the tile. Start with fixtures and hardware: new faucets, showerheads, cabinet pulls, and a framed mirror modernize the room for a fraction of a remodel.

  • Replace dated light fixtures
  • Regrout or refresh tile instead of replacing it
  • Add a vanity with real storage

Flooring, Energy Efficiency, and Low-Cost Improvements With Resale Potential

Low-cost improvements with resale potential often outperform big-ticket projects. Flooring and energy efficiency both fall into this group.

Buyers notice worn carpet and scratched hardwood immediately. They also ask about utility bills. Addressing both signals that the home is well cared for.

Contact Us For A No-Cost, No-Obligation Consultation →

Flooring and Carpet Decisions

Flooring is one of the few upgrades where condition matters more than style. Stained, pet-damaged carpet drags down every room it touches.

  • Replace worn carpet with neutral tones
  • Refinish hardwood instead of replacing it
  • Patch damaged areas to match existing flooring

Energy-Efficient Upgrades and Smart Home Technology

Energy-efficient upgrades lower a buyer’s ongoing costs, and smart home technology adds convenience buyers now expect.

  • Add a smart thermostat
  • Seal drafts around doors and windows
  • Upgrade to LED lighting throughout

Your Home Renovation Project Checklist: Timeline, Budget, and Risk Control

A home renovation project checklist keeps spending aligned with your selling timeline. The right plan for a six-month sale looks nothing like the plan for a five-year hold. Most sellers get this backwards, starting with the projects they want and fitting a timeline around them. Start with the timeline and budget, and let those constraints choose the projects.

Step 1: Get a Pre-Sale Inspection Before You Spend a Dollar on Cosmetics

A pre-sale inspection is the single highest-leverage move in this article. For a few hundred dollars, you learn what a buyer’s inspector will find before the buyer does, and that changes the order of your spending.

A structured triage works like this:

  1. Safety and structural issues first. Roof leaks, foundation cracks, electrical hazards, gas line concerns, and anything that could fail an appraisal or a lender’s requirements. These are non-negotiable.
  2. Systems that trigger objections. HVAC age, water heater condition, plumbing under sinks, and evidence of past water intrusion. Buyers and their agents negotiate hard on these.
  3. Visible deferred maintenance. Cracked tile, peeling exterior paint, a sticking garage door, a running toilet. Cheap to fix, expensive to leave.
  4. Cosmetic upgrades last. Paint, fixtures, hardware, staging. These only matter once the first three tiers are handled.

The logic is simple: a buyer who finds a safety issue during inspection will discount the price by more than the repair would have cost, often more than the repair plus the cosmetic upgrade combined.

Step 2: Build a Budget With a Real Contingency

Set a total renovation budget, then carve out a contingency before allocating anything else. A 15% contingency is reasonable for cosmetic work; for anything touching plumbing, electrical, or structure, 20% is safer.

Then allocate in this order:

  • Contingency reserve (15-20%)
  • Safety and structural repairs
  • Systems repairs flagged by inspection

If the budget runs out before you reach the bottom of the list, that is not a failure. It means the money went where it returns the most.

Step 3: Understand the Renovation Risks Nobody Warns You About

Over-improvement is the quiet killer of resale returns, but it is not the only risk. The others are less discussed and just as expensive:

  • Permits. Structural, electrical, plumbing, and many HVAC changes require permits in most jurisdictions. Unpermitted work can surface during a buyer’s inspection or title search and stall a closing. If a contractor offers to skip the permit to save time, that is a warning sign, not a favor.
  • Contractor estimates. Get at least two written estimates with a defined scope. Verbal estimates and open-ended scopes are how budgets double. Ask what is excluded, demo, disposal, drywall repair, and paint are common exclusions.
  • Project delays. Supply lead times for cabinets, countertops, and appliances can run weeks to months. Starting a kitchen project eight weeks before listing is a recipe for a half-finished room on photo day.

Step 4: Match Your Plan to Your Selling Horizon

The same house, sold on two different timelines, calls for two different plans.

Selling within 12 months, the fast plan:

  • Pre-sale inspection and repair triage
  • Deep clean and declutter
  • Interior paint in neutral tones

Selling in 2-5 years, the balanced plan:

  • Everything in the fast plan, done early
  • One mid-range project with strong local comparables, usually the kitchen or a primary bath
  • Energy efficiency upgrades that lower your own utility bills while you live there

Selling in 5+ years, the long plan:

  • Larger projects that you will enjoy before you sell
  • Layout changes and additions, if the neighborhood supports the resulting price
  • Keep records: capital improvements can affect your tax basis when you sell, as described in IRS guidance on home improvements and basis

Step 5: Know When to Stop

The hardest part of preparing a home for sale is knowing when to stop spending. The answer is almost always earlier than you think. Once your home is at the top of its comparable set in condition, additional spending does not raise the price, it just raises your cost. Match the neighborhood, fix what is broken, make it clean and bright, and stop.

Key Takeaway
The best resale strategy is not the biggest remodel. It is the one that matches your market, your timeline, and your budget without over-improving past what buyers will pay for. Inspect first, repair second, upgrade third, and stop when you reach the top of your block.

Frequently Asked Questions

What adds the most resale value to a home?

The projects with the strongest resale potential are usually the ones that improve how the home looks, functions, and feels on day one: fresh interior paint in neutral colors, exterior cleanup and curb appeal, minor kitchen updates, and bathroom fixture replacements. Repairs to broken items and a thorough cleaning also matter because buyers price visible problems into their offers. The right mix depends on your local resale market, so it helps to compare your home against recently sold properties in your area before deciding where to spend.

Should I remodel my kitchen or bathroom before selling?

It depends on condition and timeline. A full kitchen remodel can pay off if your kitchen is genuinely outdated and the rest of the home supports that level of finish. If the kitchen is functional but dated, minor remodeling such as new hardware, light fixtures, a backsplash, and fresh paint often delivers better cost recovery. The same logic applies to bathroom remodel resale value: replacing fixtures, faucets, and mirrors usually costs less and appeals to more buyers than a full gut renovation.

How do I avoid over-improving my home for the neighborhood?

Compare your planned scope against the most expensive recently sold homes nearby. If your project would make your house the clear outlier on the street, you are likely to lose money at resale because buyers in that area are not paying for that level of finish. Focus on upgrades that bring your home up to the neighborhood standard rather than beyond it. A design professional can help you set that ceiling before you commit to a renovation budget.

How long before selling should I start home renovations?

For cosmetic work such as paint, flooring, and fixture swaps, three to six months gives you time to complete the work without rushing. For a kitchen or bathroom remodel, six to twelve months is more realistic once you account for design, permitting, material lead times, and construction. Starting too late forces rushed decisions and can push you into a sale with unfinished work, which weakens your negotiating position. Build a home renovation project checklist with dates and a contingency buffer.

Contact Us For A No-Cost, No-Obligation Consultation

Filed Under: Blog Tagged With: bathroom remodel resale value, home improvements that increase value, home renovation project checklist, home resale value, how to maximize home resale value, kitchen remodel resale value

Master Bathroom Remodel Timeline: A Homeowner’s Guide

October 13, 2026 by Capitol Design

Table of Contents

  • How Long Does a Master Bathroom Remodel Take?
    • Factors That Determine Your Project Length
  • Planning and Design Phase: Setting Your Foundation
  • Permits, Inspections, and Pre-Construction Preparation
  • Your Bathroom Renovation Timeline: Week-by-Week Breakdown
    • Weeks 1-3: Demolition and Rough Work
    • Weeks 4-7: Plumbing, Electrical, and Framing
    • Weeks 8-10: Waterproofing, Tile, and Fixtures
    • Weeks 11-13: Finishing Touches and Final Inspection
  • Bathroom Remodel Checklist for Homeowners
    • Pre-Construction Checklist
    • During Construction Checklist
    • Post-Construction Checklist
  • Creating Your Bathroom Remodel Project Schedule
  • What Delays Your Master Bathroom Remodel and How to Avoid Them
    • Material and Fixture Lead Times
    • Hidden Damage and Structural Issues
    • Permit and Inspection Delays
    • Change Orders and Scope Creep
  • Keeping Your Bathroom Usable During Construction
  • Frequently Asked Questions

Last Updated: October 14, 2026

How Long Does a Master Bathroom Remodel Take?

A master bathroom remodel timeline typically ranges from 8 to 13 weeks for a full renovation, depending on scope and complexity.

The timeline you hear about often excludes weeks spent planning and waiting for permits, when someone says “a bathroom remodel takes 6 weeks,” they mean active construction only. The real master bathroom remodel timeline starts the moment you decide to renovate.

Factors That Determine Your Project Length

Several variables control your project length. Scope is the primary driver: a simple refresh moves faster than a gut renovation with structural changes. Layout modifications, especially moving plumbing lines, add weeks.

Material lead times are critical: custom cabinetry, specialty tile, and high-end fixtures can take 4 to 8 weeks to arrive.

Hidden damage found during demolition can add 1 to 3 weeks, water damage, structural rot, or outdated wiring requires remediation before moving forward.

Planning and Design Phase: Setting Your Foundation

Start with an initial consultation and site assessment: a designer or contractor walks through your space, photographs it, takes measurements, and discusses your goals.

Once you’ve settled on a design direction, detailed planning begins: construction documents, material and workmanship specifications, and a project schedule.

Material selection happens during this phase. Choosing tile, paint, hardware, fixtures, and finishes requires showroom visits and sample reviews, small decisions that compound.

Permits, Inspections, and Pre-Construction Preparation

Permits and pre-construction preparation typically take 4 to 8 weeks, depending on your local building department and the complexity of your project.

Permit applications require construction documents, site plans, and sometimes engineering drawings for structural changes.

Once permits are issued, pre-construction preparation begins: utility disconnections, dumpsters, job-site access, and space prep, typically 1 to 2 weeks.

A pre-construction meeting with your contractor, designer, and key tradespeople clarifies expectations and confirms the schedule, typically 1 to 2 weeks before demolition starts.

Your Bathroom Renovation Timeline: Week-by-Week Breakdown

A realistic master bathroom remodel timeline breaks into four construction phases. This week-by-week framework shows what’s happening, when to expect disruption, and when decisions are needed.

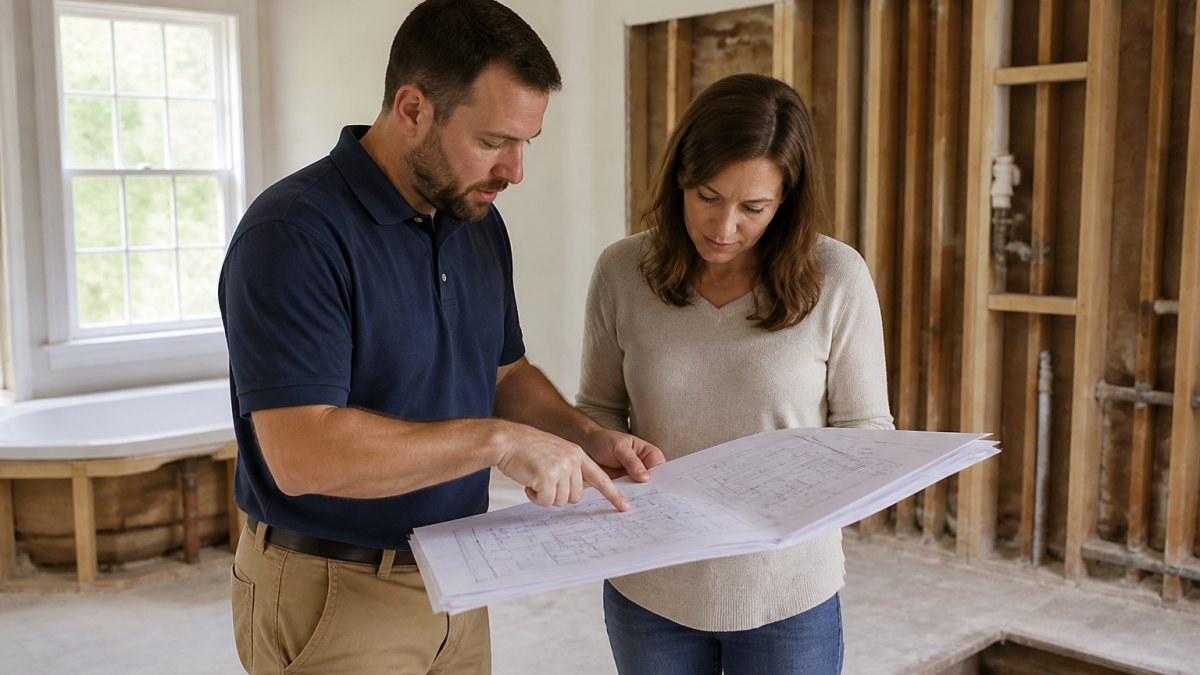
Contractor and homeowner reviewing construction plans and timeline documentation at a job site with partially demolished bathroom visible in background, natural daylight from window

Weeks 1-3: Demolition and Rough Work

Demolition is the most disruptive phase, typically 1 to 2 weeks. Your contractor removes fixtures, cabinetry, flooring, and wall finishes. Tile removal takes longer, old tile and adhesive are labor-intensive.

Rough plumbing and electrical follows, usually another 1 to 2 weeks: new water lines, drain lines, and circuits installed before walls close. This phase requires building department inspection.

Framing adjustments, if needed, happen here. Removing walls, reinforcing headers, or adjusting ceiling heights requires a framing contractor and structural approval.

Weeks 4-7: Plumbing, Electrical, and Framing

Plumbing continues with fixture rough-ins, the pipes and fittings connecting your shower, toilet, and vanity. Electrical rough-in installs wiring for outlets, lighting, and ventilation fans.

Waterproofing preparation begins for large or steam showers. Membranes and schluter systems go up before tile, requiring careful installation.

Wall preparation happens in parallel: drywall hung, taped, and mudded. If you’re relocating plumbing or electrical, walls may need opening and patching. This sets the stage for finishing surfaces.

Weeks 8-10: Waterproofing, Tile, and Fixtures

Tile installation is the most visible phase, typically 2 to 3 weeks depending on extent. Large-format tiles and complex patterns take longer than subway tile.

Fixture installation begins as tile finishes: vanities, toilets, and shower doors go in, plumbing connections are completed, and electrical fixtures like lighting and exhaust fans are mounted. This usually takes 1 to 2 weeks.

Paint and wall finishes happen here: walls primed and painted, wallpaper or specialty finishes applied. Paint curing takes 24 to 48 hours before the next phase.

Weeks 11-13: Finishing Touches and Final Inspection

Hardware installation, towel bars, mirrors, soap dispensers, and cabinet hardware, completes the aesthetic phase. This takes 2 to 3 days, scheduled during the final week.

Caulking and sealant protect tile joints from water intrusion, and grout is sealed if appropriate for your tile. Touch-ups and final adjustments happen here.

A final walkthrough identifies punch list items, small details needing correction. Most punch lists take 1 to 2 weeks. A final building department inspection certifies code compliance; once approved, your bathroom is ready.

Bathroom Remodel Checklist for Homeowners

A structured checklist keeps your master bathroom renovation timeline on track. Breaking the project into pre-construction, during-construction, and post-construction phases keeps you organized.

Contact Us For A No-Cost, No-Obligation Consultation →

Pre-Construction Checklist

  • Define your vision and create a mood board of styles and finishes you like
  • Establish a realistic budget and identify your non-negotiables
  • Interview and select a designer and contractor
  • Finalize design and create detailed construction documents
  • Select all materials, fixtures, and finishes
  • Apply for building permits and obtain approval
  • Schedule utility disconnections if needed
  • Arrange for dumpster rental and job-site access
  • Confirm the construction start date and timeline with your contractor
  • Arrange temporary bathroom access during construction

During Construction Checklist

  • Attend the pre-construction meeting with your contractor and trades
  • Review and approve rough-in inspections before walls close
  • Inspect tile work and layout before grouting
  • Confirm all fixture installations match your design
  • Review paint and finish colors in the actual space
  • Walk through the space weekly and document any concerns
  • Approve any change orders in writing before work proceeds
  • Schedule the final inspection with the building department

Post-Construction Checklist

  • Complete a final walkthrough with your contractor
  • Address any punch list items before final payment
  • Obtain a final inspection sign-off from the building department
  • Collect all warranties and maintenance documentation
  • Photograph the finished space for your records
  • Review care instructions for tile, grout, and finishes
  • Schedule any required follow-up maintenance or sealing

Creating Your Bathroom Remodel Project Schedule

Your master bathroom remodel timeline must account for dependencies, tasks that can’t start until others finish.

Map backward from your desired completion date, working through each phase.

Account for material lead times early.

Build in 1 to 2 weeks of buffer for inspections.

Coordinate with your contractor on labor availability. If they have other projects, your bathroom may not get full-time attention.

Document the schedule in writing. Capitol Design provides clients a detailed project schedule showing each phase, key milestones, and inspection dates.

What Delays Your Master Bathroom Remodel and How to Avoid Them

Most delays fall into predictable categories. Understanding them lets you plan defensively and minimize disruption to your master bathroom remodel timeline.

Material and Fixture Lead Times

Custom cabinetry, specialty tile, and high-end fixtures often have 4 to 8 week lead times. Ordering after construction starts delays the entire project. Order long-lead items during design, as soon as selections are finalized, and track order dates, expected delivery, and confirmation numbers in a spreadsheet.

Verify delivery dates 2 weeks before expected arrival, suppliers sometimes push dates back without notice. Catching delays early lets you adjust the schedule or source alternatives.

Hidden Damage and Structural Issues

Water damage, mold, or outdated wiring found during demolition can add 1 to 3 weeks. You can’t prevent these surprises, but you can plan: budget 5 to 10 percent contingency time and reserve funds for repairs. Ask your contractor about common issues in homes of your age and type during the initial consultation.

Permit and Inspection Delays

Building departments vary widely: some approve permits in 2 weeks, others take 6 to 8 weeks. Call yours to ask about typical timelines and submit applications early, even if construction won’t start immediately. A 2-week head start can absorb delays without pushing back your start date.

Rough inspections sometimes reveal code issues. If rough plumbing or electrical fails, corrections take 1 to 2 weeks. Hire a contractor with a track record of first-attempt passes, ask for recent references and confirm their inspection pass rate.

Change Orders and Scope Creep

Changes during construction are expensive and slow. Every change order requires design decisions, material sourcing, and schedule adjustments. Minimize changes by deciding during design, not construction. If you change your mind mid-project, expect a longer timeline and higher costs.

Document all changes in writing. A verbal agreement about adding a heated towel rack can become a conflict if expectations differ. Written change orders prevent misunderstandings and keep the project on track.

Keeping Your Bathroom Usable During Construction

A master bathroom renovation displaces you from your primary bathroom for 8 to 13 weeks.

If you have a second bathroom, designate it as your primary during construction.

If you don’t have a second bathroom, discuss temporary solutions with your contractor.

Communicate your needs to your contractor. Ask about dust control and temporary bathroom access before signing a contract.


A master bathroom remodel timeline spans 8 to 13 weeks when you account for planning, permitting, and construction.

Frequently Asked Questions

How long should a master bathroom remodel take from start to finish?

A typical master bathroom remodel takes 8 to 16 weeks, depending on project scope and complexity. A basic refresh with new fixtures and paint may take 4 to 8 weeks, while a full gut renovation with structural changes, custom tile, and high-end finishes can extend to 4 to 5 months or longer. Planning, permitting, and material ordering often add 2 to 4 weeks before construction begins, making the total timeline 3 to 6 months from initial consultation to final inspection.

What delays a master bathroom remodel most often?

The most common delays include material lead times (custom fixtures and tiles can take 6 to 12 weeks to arrive), permit and inspection scheduling, hidden water damage or structural issues discovered during demolition, and change orders that expand the scope. Labor availability and contractor scheduling also impact timelines. Building delays into your project schedule and ordering materials early helps protect against these setbacks.

Should I use my bathroom during a remodel?

Most homeowners cannot use their master bathroom during active demolition and rough construction phases. However, you can maintain bathroom access by using a guest bathroom or powder room, installing a temporary shower enclosure, or scheduling construction phases strategically. Discuss bathroom access with your contractor during the planning phase. Some projects allow limited use after plumbing and electrical work are complete, but this depends on your project schedule and scope.

What is the best bathroom remodel checklist for homeowners?

Your checklist should cover pre-construction (design finalization, permit applications, material ordering, site preparation), during construction (weekly inspections, photo documentation, change order approvals, budget tracking), and post-construction (final walkthrough, punch list completion, fixture testing, permit sign-off). Keep records of all decisions, contracts, and timelines. A detailed bathroom remodel checklist helps you stay organized, catch issues early, and ensure your contractor meets deadlines and quality standards.

How far in advance should I order bathroom fixtures and materials?

Order fixtures and materials as soon as your design is finalized and permits are submitted, typically 4 to 8 weeks before demolition begins. Custom tiles, vanities, and specialty fixtures often have lead times of 8 to 16 weeks. Ordering early prevents construction delays and gives you time to address any supply chain issues. Work with your contractor to confirm delivery dates align with your project schedule, and factor in 1 to 2 weeks of buffer time for unexpected delays.

Can I live in my home while my master bathroom is being remodeled?

Yes, most homeowners remain in their homes during a master bathroom remodel. You’ll need access to another bathroom (guest bath or powder room) during demolition and rough construction. Plan for dust, noise, and contractor traffic during business hours. Discuss daily work schedules, site cleanup, and protective measures with your contractor to minimize disruption. Many projects allow you to resume limited master bathroom use after plumbing and electrical work are complete, though finishing work continues.

What happens if my contractor discovers hidden damage during demolition?

Hidden damage such as water damage, mold, or structural rot is common in older bathrooms and can extend your project timeline by 1 to 3 weeks. Your contractor should document the damage, provide a change order with revised costs and timeline, and explain the work needed to address it. This is why building 1 to 2 weeks of contingency time into your project schedule is important. Discuss how change orders will be handled before construction begins to avoid surprises.

Contact Us For A No-Cost, No-Obligation Consultation

Filed Under: Blog Tagged With: bathroom remodel checklist for homeowners, bathroom renovation timeline, how long does a bathroom remodel take, master bathroom remodel timeline, master bathroom remodel timeline for homeowners

  • « Go to Previous Page
  • Page 1
  • Page 2
  • Page 3
  • Page 4
  • Go to Next Page »
  • HOUZZcapitol-design-houzz
  • FACEBOOKcapitol-design-facebook
  • TWITTERcapitol-design-twitter
  • GOOGLEcapitol-design-google
Copyright © 2026 Capitol Design | 512-464-1155

Website Design by KEX Consulting